

The thing I love most about blogging is the photography side of it, I get to be as creative as I like and that makes me happy. Basically I love a good flat lay.
But I totally get that some of you don't!
Blog photography is literally back breaking work (okay, not literally, but nearly), natural lighting is beyond temperamental and understanding how to get the best out of a camera can be tricky not to mention boring. So that's why I've decided to give you a few free* high quality stock images that you can do as you wish with (for personal use only) - blog posts, cropped for social media... whatever you like! Basically I love giving away free stuff to help fellow bloggers and I realised I haven't created anything since my Free Printable Weekly Blog Planner way over a year ago now!
*If you ever want to repay my kindness and find yourself visiting the U.S feel free to pick me up a zillion Bath & Body Works candles! I joke... but seriously if you want to I won't stop you.
Please Credit!
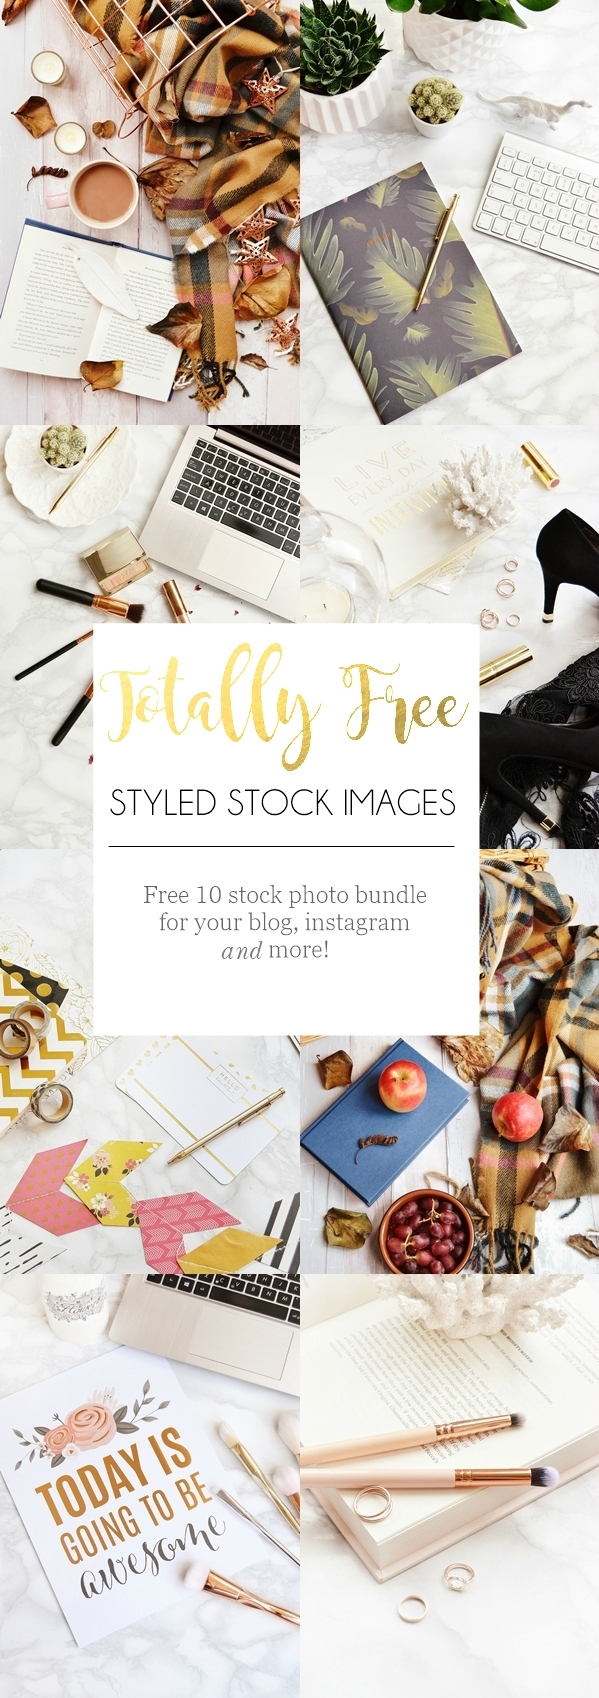
Of course I'd LOVE if you could credit my blog if you use any of the images, just a tiny 'source – Makeup Savvy' linked to back to my homepage or this post. But if you don't I won't hunt you down, I'm cool like that. Anyway, so here are the 10 styled stock images in 4 swanky themes – Makeup, Lifestyle, Girl Boss and Seasonal (Autumn!). Simply right click over the image and 'Save Image As...'.
You can also find ideas of how to style/use these free lifestyle stock images at the bottom of the post - enjoy!
You can also find ideas of how to style/use these free lifestyle stock images at the bottom of the post - enjoy!
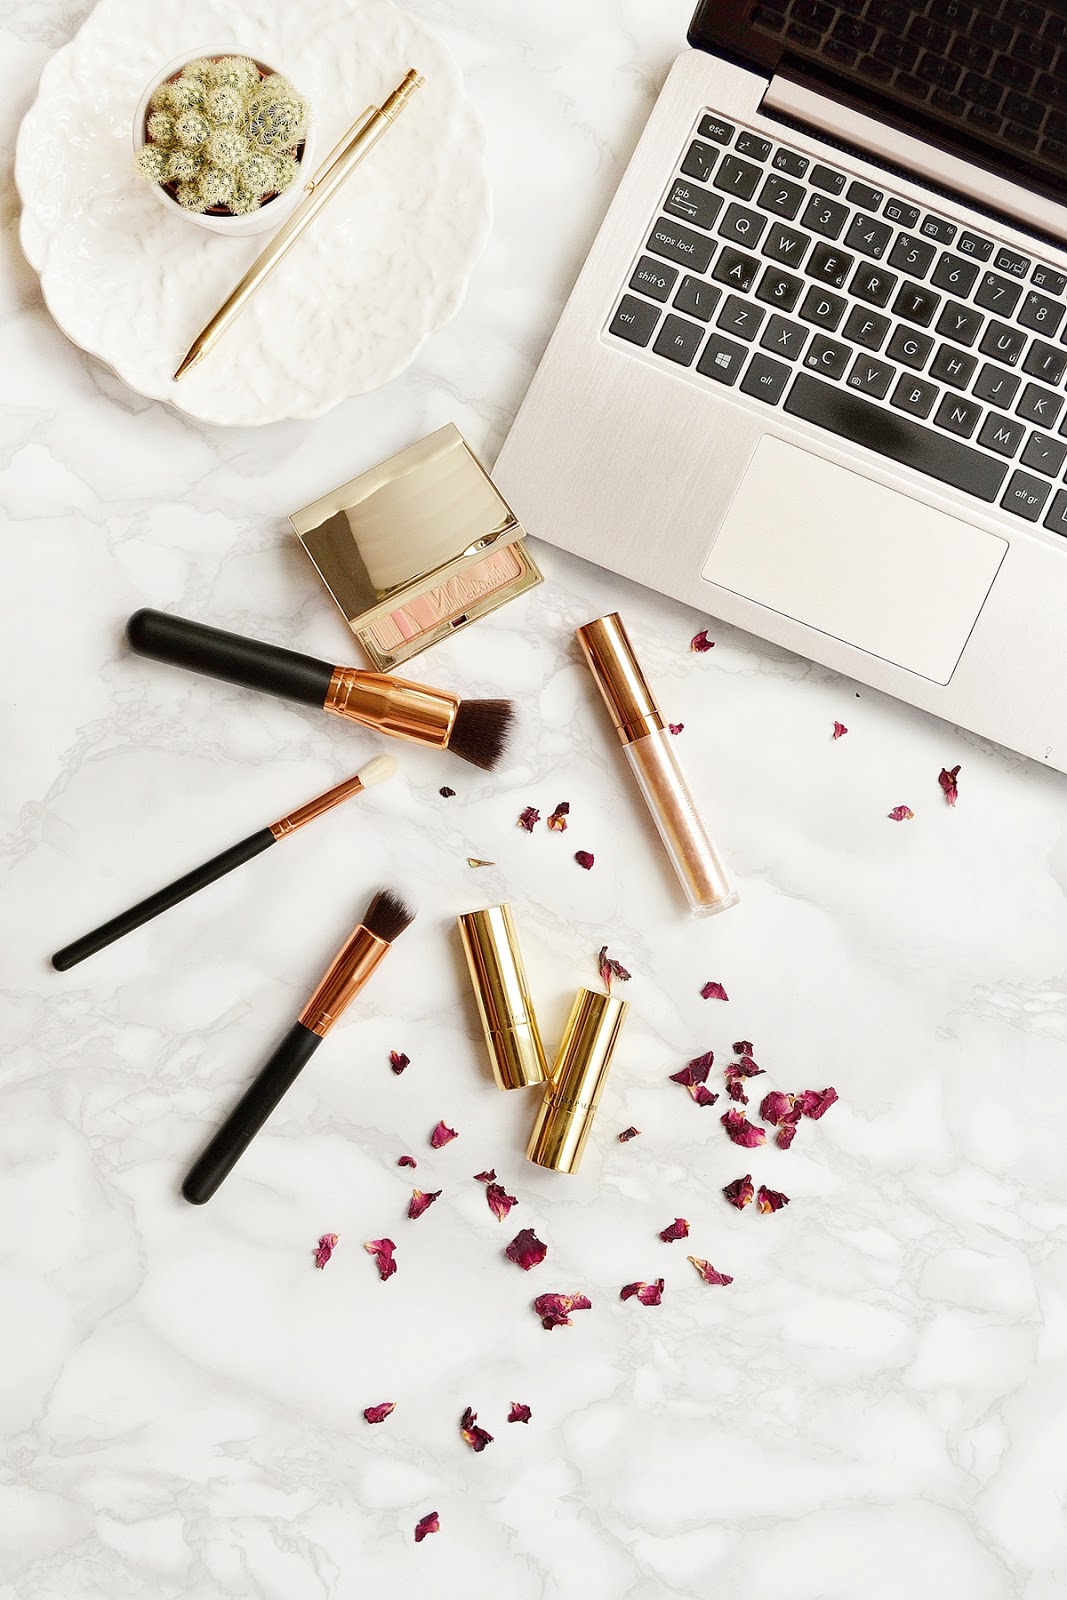
Makeup Stock Images


Lifestyle Stock Images


Girl Boss Stock Images


Seasonal Stock Images


How to get the most use out of these styled stock photos
You could always leave the images plain but below I've given you a few rough ideas on how to could use text with them. Images with a fine white inner boarder always look great and of course modern calligraphy fonts (DaFont.com do some good free ones!) make any image creative and done. My personal favourite has to be the Autumn stock image with rose gold foil text!
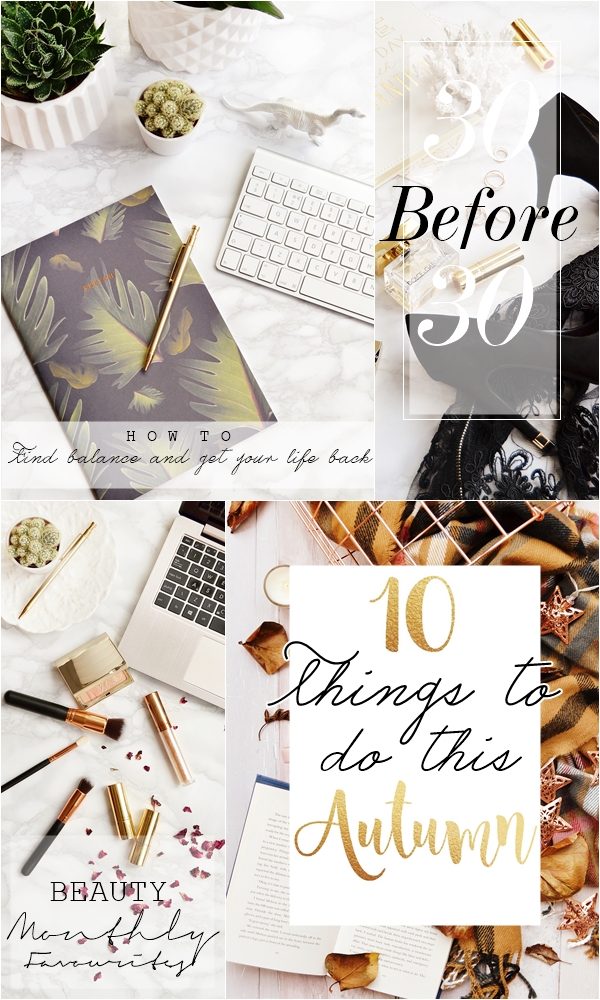
As mentioned feel free to use these how you wish – Blog posts, Instagram, Facebook, cropped as sidebar buttons for your social media platforms etc etc. With a little credit back to myself or if you want a cheeky pin of this post on Pinterest because I'm getting into it – finally!
Really hope you can make use of these styled stock images!
Fee xo.
Related (ish) free stuff :

I don't know about you, but Google Analytics makes my brain hurt - a lot.
If I spend more than 5 minutes doing anything other than looking at my pageviews and wondering if 'bounce rate' really matters (that's as far as my knowledge goes) then I feel overwhelmed by all the stats and click 'X'.
But you see all the stats and figures that can literally monitor and measure everything within a website, aren't technically needed if you are a blogger. Okay, if you are into that then great, but for the general blogger it's fine to only understand the basics.
So wouldn't it be great if you could have a dashboard that only showed the important stuff?
Well whilst doing my nightly search on Pinterest for all things helpful, I call it my blogucation, I came across just that, by wonderful blogger Kate over at Small Paper Things! Yep, she's actually gone and made the most simple and FREE plugin for Google Analytics just for bloggers that places all the good stuff you need to be tracking onto your main dashboard - how clever, right?!
A simpler solution for bloggers
You can find the dashboard/plugin/whatever you want to call it - here and it literally takes seconds to implement on your Google Analytics account; it's as simple as openinga new tab and clicking a drop down menu. I should point out I'm blogging about this because I've never come across anything similar before and I've always hated Google Analytics! Kate also kindly explains what everything on the dashboard means, some of which I didn't know, so I was grateful for that. |
| An example of the blogger-friendly dashboard |
What I love about my new Blogger GA Dashboard
Okay, so all of this stuff isn't new and can be found in the sidebar menu with a bit of digging, but so many times I'd forget where to find certain things. So for that reason I'm loving that Keywords that's headed as 'Content Ideas' is now right there for me and I also kinda' love that I can see instantly see how many people are currently on my blog in real time! Not needed... but so fun!The most helpful thing is knowing what my main traffic sources are, especially as I'm trying to drive more page views/readers to my blog from Pinterest. So I can now monitor my page views from Pinterest every time I click onto my analytics.
Thanks Kate, you're a star!
I really love bloggers like this, that provide such helpful resources - totally free! Because clearly Kate is an online genius and 100% doesn't need a simplistic view of Google Analytics... but she gets it, and is kind enough to come up with a solution! That's why I had to make this impromptu techy blog post as I know a lot of fellow bloggers also don't understand Google Analytics and either just look at pageviews (that was me!) or avoid it entirely. I really think this new dashboard will help me track the things I need to know about and stop my brain from feeling like it will explode from all the stats, finally!I hope you've found this post mildly interesting to read, it was a tad zzzz, but Kimberley's dashboard is a huge help!
Let me know if you decide to get it so we can nod in agreement at how clever it is!
Fee xo.
P.S. I'm trying out my text left align, instead of centered... let me know what you think. It's supposedly easier on the eyes! Humm, I'm not sure yet.
For the past 6 weeks I've been experiencing some pretty severe fatigue (thanks, Vitamin D deficiency) and the last thing I've wanted to do is blog if I'm totally honest. While most of you won't be feeling like a sloth due to an obsession with SPF, blogging slumps can come on for various reasons, good and bad - I know I've wanted to blog less when I got addicted to watching Making A Murderer! But ditching your blog when you've worked so hard on it just isn't an option.
Which is why I came up with my monthly 3-hour blog planning solution that has actually motivated me to blog more even if I'm still feeling like sh*t! It's a mixture of inspiring yourself to blog while carefully planning the right content + making your blogging month that bit easier!
Basically here's how I got my blogging mojo back in 3 little hours!
Basically here's how I got my blogging mojo back in 3 little hours!
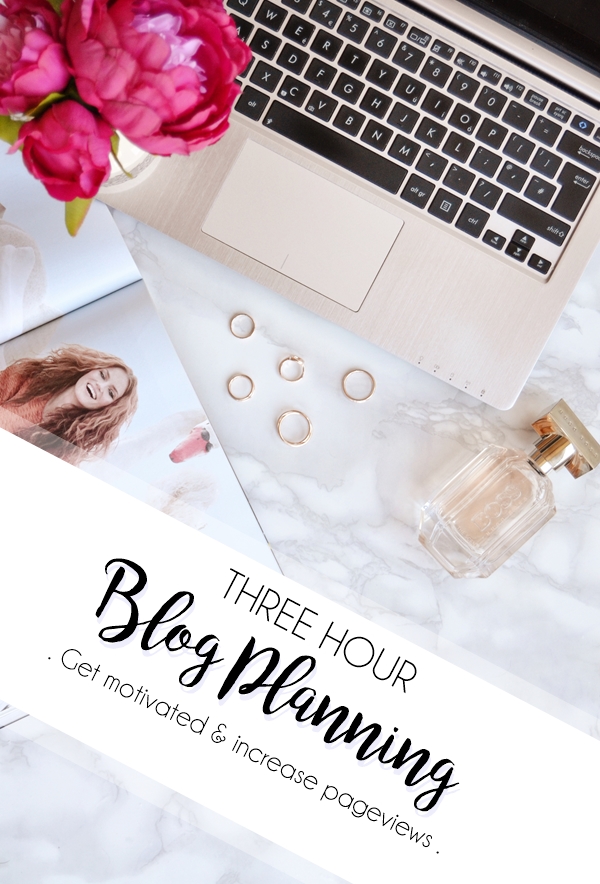
 |
| My stock image library for September |
Plan out your blog content for the month ahead
This may seem an obvious one, but I certainly wasn't doing it so far in advance, but it makes a huge difference. But unlike normal blog post planning the aim here is to plan your content around myself/your needs and then think about what your readers want. How I like to plan my content is to have a huge brainstorm and write down as many ideas for blog posts as possible and also products I want to review over the coming month. I when decide realistically how often I can blog each week and start to plan it all out. If you're not feeling blogging right now include fun and easy posts each week such as wishlists and tags that won't take much time.
This may seem an obvious one, but I certainly wasn't doing it so far in advance, but it makes a huge difference. But unlike normal blog post planning the aim here is to plan your content around myself/your needs and then think about what your readers want. How I like to plan my content is to have a huge brainstorm and write down as many ideas for blog posts as possible and also products I want to review over the coming month. I when decide realistically how often I can blog each week and start to plan it all out. If you're not feeling blogging right now include fun and easy posts each week such as wishlists and tags that won't take much time.
- Include at least one easy to write/fun blog post per week
- Think about what your readers want to see and when. Examples - Haul posts on/after payday, seasonal posts. This all increases page views!
Shoot & edit your own blog stock images
I've briefly mentioned creating a stock image library before because it's so handy when it comes to days you just aren't in the mood to take photos or the weather is too dark or you just fancy getting a post up quickly. For this I aim to take between 4-8 different images with slightly different themes to them. If flatlays don't come naturally to you then seeking inspiration on Pinterest or from your favourite blogs will seriously help. Once I've shot 4-8 setups I then jump on my laptop, select my favourites and edit them. These can be then used throughout the month just by adding a bit of text - for this I use PhotoScape or Canva. Above are my own stock images and as you can see I used the top left image for today's blog post just by adding a diagonal strip and text, which took me all of 5 minutes!
I've briefly mentioned creating a stock image library before because it's so handy when it comes to days you just aren't in the mood to take photos or the weather is too dark or you just fancy getting a post up quickly. For this I aim to take between 4-8 different images with slightly different themes to them. If flatlays don't come naturally to you then seeking inspiration on Pinterest or from your favourite blogs will seriously help. Once I've shot 4-8 setups I then jump on my laptop, select my favourites and edit them. These can be then used throughout the month just by adding a bit of text - for this I use PhotoScape or Canva. Above are my own stock images and as you can see I used the top left image for today's blog post just by adding a diagonal strip and text, which took me all of 5 minutes!
- These can be carried over to the next month and re-used multiple times
- Perfect for blog tip and lifestyle posts
Write up a weeks worth of catchy blog titles and save them
Getting blog post titles wrote and saved as blog posts can be such a motivation because whenever you go onto your blogging platform they will be waiting for you and you can write bits as and when you feel like it. Also planning out your titles instead of writing them just before you write the blog post means you will create more interesting titles that people will want to click on! For extra help creating eye catching blog posts this title template I found on Pinterest is great or you can even paste your title into CoSCoschedule Headline Analyzer which will score your headline and really help you make it the best it can be - I love this free resource!
Getting blog post titles wrote and saved as blog posts can be such a motivation because whenever you go onto your blogging platform they will be waiting for you and you can write bits as and when you feel like it. Also planning out your titles instead of writing them just before you write the blog post means you will create more interesting titles that people will want to click on! For extra help creating eye catching blog posts this title template I found on Pinterest is great or you can even paste your title into CoSCoschedule Headline Analyzer which will score your headline and really help you make it the best it can be - I love this free resource!
*Planned out titles will always attract more page views
*You've already started your post so you'll feel motivated to write it up!
This 3-hour blog planning really has motivated me at a time when I seriously need it and I couldn't recommend it more - if you give it a go let me know how you get on in the comments!
Fee xo.
This 3-hour blog planning really has motivated me at a time when I seriously need it and I couldn't recommend it more - if you give it a go let me know how you get on in the comments!
Fee xo.
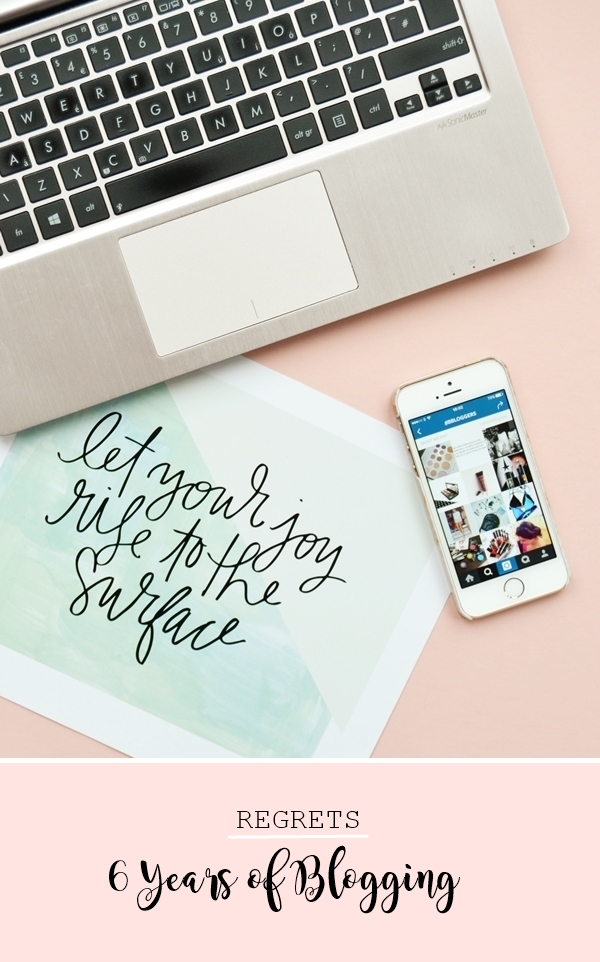
I'm not really one for regrets so this post kind of doesn't make much sense! However I think we all get thoughts that pop into our head that in hindsight we would have done differently - these are those.
My 'blogger regrets' haven't really affected my blogging as a whole but along the way some of my choices hindered things and I know they could definitely help a few newbie bloggers! So here are my 'regrets' when it comes to blogging.
Not getting more professional earlier on
When I first started Makeup Savvy back in February, 2010 it was purely a hobby after blogging about interiors and soon getting bored from the lack of community and interaction. But within six months to a year of beauty blogging I knew it was different and something that I could grow. I didn't know exactly what I could grow it into but looking back now I wish I had my head screwed on a bit more to snap up that £6.00 domain sooner, get my head around tax and paying for a good blog design instead of days of html headaches. Though these things haven't hindered me as such I feel my blogging journey could have come with a few less headaches if I'd have been a bit more proactive when I started to see the potential of my blog!
Thinking it was quantity over quality
For years and years I was more concerned with how many times I was blogging per week than the quality of my posts. I think this is something most bloggers get sucked into as we see a high percentage of fellow bloggers updating their blog on a daily basis, if not twice daily! This trap of rushing content has seen me blog 6 times a week and yes, I even went for blogging twice a day at one point in aid to increase pageviews and interaction on my blog. So did it work? Nope! Of course it may work for some but I found as I blogged more about offers, the nail polish I was wearing that day and similar throw-away posts I was receiving less and less comments and eventually page views. I've now taken my foot off the gas and write 3-4 times a week and take much more time over my posts, from the photography to structuring my post more. My page views may have settled off now with more loyal readers (which I'm fine with!) but they are higher than the days of blogging 6 times a week and I've now found my groove.
Apologising for not blogging
Arghh, this is annoying one! Why do us bloggers do it? NO ONE CARE! Okay, maybe if I disappeared from blogging for 2 months a few of you would start to notice but if I miss a few posts here and there or even take a break from blogging for a week, you get it! Everyone has life stuff to deal with or even enjoy, whether that's family stuff of the good and bad kind, a rubbish cold that leaves you wanting to hibernate in bed or you simply don't want to waste a sunny weekend by being indoors typing away. As you can see I now totally get it and if some weeks I post only 2 blog posts because of, well whatever, I now don't apologise for my absence, I just don't mention it! If you're a fellow blogger that keeps on falling into this apologetic trap and feeling quality for taking time out then simply remember that your readers read more than one blog (probably 50, tbh) and it's really not a big deal to them... they probably don't even notice!
Being won over by PR samples
Over the years I've been lucky enough to receive quite a high number of PR samples and some with pretty much unrelated gifts - i.e blogging bribery! At first as I was relatively new to beauty blogging and receiving essentially free products I was excited. I was amazed I was 'worthy' of being sent PR samples that I would always make sure to review them and 9 times out of 10 with a glowing review. Of course this is now a regret as I blog to inform readers of products worth buying and not to please PR companies. These days though I'm still grateful for receiving PR samples and being kept in the loop of new launches and brands I'm realistic and only include products that really deserve mentioning after weeks of trying them out. Gone are the days I include PR samples after numerous emails from the PR company asking when a review will be up. Gone are the days I instantly share new products on my social media due to receiving extra unrelated free gifts and certainly gone are the days I risk you spending your well earned money on a products that aren't all that.
Hope you've enjoyed this honest post!
If you're a fellow blogger then certainly feel free to do a similar post on your own blog - I'd love to read it!
Fee xo.
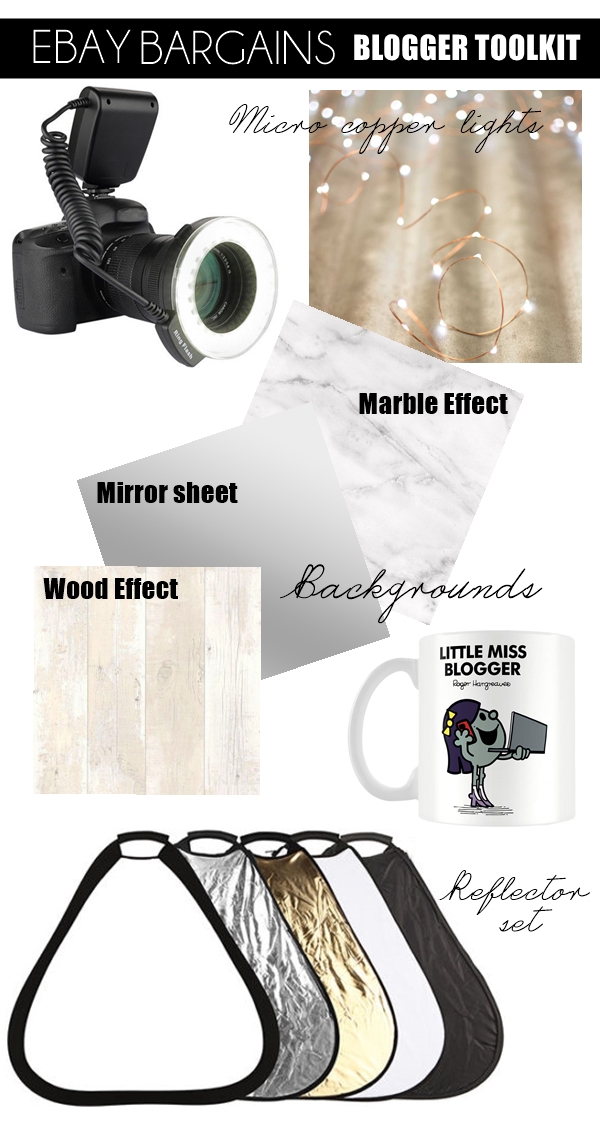
LED Camera Ring Light for Nikon/Canon/Panasonic (£22.49 HERE)
I always recommend shooting in natural light as it gives the best effect but sometimes that just isn't possible, especially if want to blog at night or just find your images to look lack luster. However to correct this you can buy a ring light that fits onto your camera lens and connects to the cameras flash. The above ring light is affordable and comes with the option to have it continuously on when shooting or to be used as a flash, I think I would prefer it to be constantly on so I can see how illuminated my shot is in live view. It also works with close-up macro photography, making it perfect for product shots and it fits various lens sizes. Just make sure to check it's compatible with your own camera!
I always recommend shooting in natural light as it gives the best effect but sometimes that just isn't possible, especially if want to blog at night or just find your images to look lack luster. However to correct this you can buy a ring light that fits onto your camera lens and connects to the cameras flash. The above ring light is affordable and comes with the option to have it continuously on when shooting or to be used as a flash, I think I would prefer it to be constantly on so I can see how illuminated my shot is in live view. It also works with close-up macro photography, making it perfect for product shots and it fits various lens sizes. Just make sure to check it's compatible with your own camera!
Micro Fairy Lights (20 lights £1.39 | 40 lights £2.54 HERE)
Fairy lights make for a lovely prop around products and I've used so many styles over the years. But my favourite discovery of 2016 has seen these lovely micro fairy lights. They are inexpensive and as they come on a wire they can be bent around products or even wrapped around them, or you can simply place them in the background for a diffused glow. They also come battery operated and there's a choice of 20 - 40 lights on a 4 metre length of wire.
Fairy lights make for a lovely prop around products and I've used so many styles over the years. But my favourite discovery of 2016 has seen these lovely micro fairy lights. They are inexpensive and as they come on a wire they can be bent around products or even wrapped around them, or you can simply place them in the background for a diffused glow. They also come battery operated and there's a choice of 20 - 40 lights on a 4 metre length of wire.
Backgrounds
If you take product shots or flat lays then it's important to find backgrounds you love and will enhance your images. I've gone through various backgrounds over the years, many from eBay and all very affordable. Here are the ones I highly recommend!
If you take product shots or flat lays then it's important to find backgrounds you love and will enhance your images. I've gone through various backgrounds over the years, many from eBay and all very affordable. Here are the ones I highly recommend!
Marble Contact Paper (£6.99 HERE) - A marble background seems to be a bloggers staple and I will admit I'm still not bored of it! It's chic, simple and can be made with simple marble contact paper. You will need to pick up a thin piece of board from a DIY store but then you simply peel off the marble sticky paper and lay it down onto the board. This means you can make your background as big or as small as you wish and you will have a sturdy background that will last years.
Coloured Acrylic Sheets (A4 £3.85 | A3 £5.25 HERE) - For years I used both a white and black acrylic sheets as my photography background and they worked great! I used A3 3mm thick sheets and with a slight reflection I really liked how they looked. They are also wipe clean so you can get creative and apply product directly onto them (as you can see here) and they store easy. A bit of a gem if you want a solid colour background that will last.
Mirror Acrylic Sheet (A4 £3.50 | A3 £8.02 HERE) - You can also pick up mirrored acrylic sheeting which looks exactly like mirror glass but won't shatter. This looks good as it's reflects the products you are photographing and is something a bit unique to try.
Driftwood Effect Wallpaper Sample - 5 styles (A4 sample 99p | 2 metre sample £2.99 HERE) - Wallpaper samples are a great way to try out different backgrounds on a budget, you can even pick them up for free in DIY stores. But if you want something a bit more unique you can find so many amazing ones on eBay. I particularly like this driftwood effect wallpaper that comes in a few colourways and can be purchased in 2 metre lengths - ideal if you want a large background.
Little Miss Blogger Mug (£9.94 HERE)
Okay, so this isn't a bargain... but I couldn't resist including it! I keep spotting this exact mug more and more on social media on the desk's of bloggers and I now feel I need to follow suit! Pricey, but mugs do last and it's just perfect for any blogger.
Okay, so this isn't a bargain... but I couldn't resist including it! I keep spotting this exact mug more and more on social media on the desk's of bloggers and I now feel I need to follow suit! Pricey, but mugs do last and it's just perfect for any blogger.
Handheld Studio Reflector Set 5-in-1 (£6.95 HERE)
Lastly I wanted to included this affordable reflector set I came across that's importantly handheld! The set consists of 5 different reflector skins that suit different shoot conditions from taking product shots to makeup looks. I know I would get the most use from the silver reflector as it's perfect for bouncing light onto flat lays/products and removing harsh shadows. So pleased with this find!
Hope you've found a few items here to add to your own Blogger tool kit!
Fee xo.

Spring is here and although it's a dull rainy day as I type this, I'm motivated and ready for a new fresh season! I love all seasons, but with brighter evenings and an awakening in nature I can't help but feel more alive and positive for the months ahead.
This also filters into blogging for me and I suddenly feel I could burst with the amount of new ideas I have! Which is exactly why I thought I'd off load a few blog post ideas here in case you're stuck for what to blog about or if you are new to blogging (if you are make sure to say hello!).
I hope you all have a lovely Spring and can use a few of these post ideas!
1. An updated Spring skincare routine
2. A Spring wish list inspired by fellow bloggers
3. Your take on a Spring beauty trend
4. Document a spring clean of your makeup stash
5. List your favourite Spring scents
6. Feel good makeup products for Spring
7. Share a Spring bath cocktail
8. Review beauty products that give a dewy finish
9. Your fresh morning shower/bath routine
10. Your favourite pastel manicure
11. Makeup that will stay put through April showers
12. Your go-to Spring lip

13. Document a perfect Spring day
14. 5 Blogs to follow this Spring
15. A check up on your New Years resolutions
16. A week in photos
17. 5 perfect Spring reads
18. A letter to Spring
19. 10 must-do things this Spring
20. A Spring/Summer wardrobe wish list
21. Your favourite Spring recipe
22. The best Spring DIYs to try on Pinterest
23. Spring lifestyle favourites
24. Your Spring wardrobe staples
25. Share your Spring Spotify playlist
Let me know if you use any of my blog post ideas so I can have a read of them!
Fee xo.
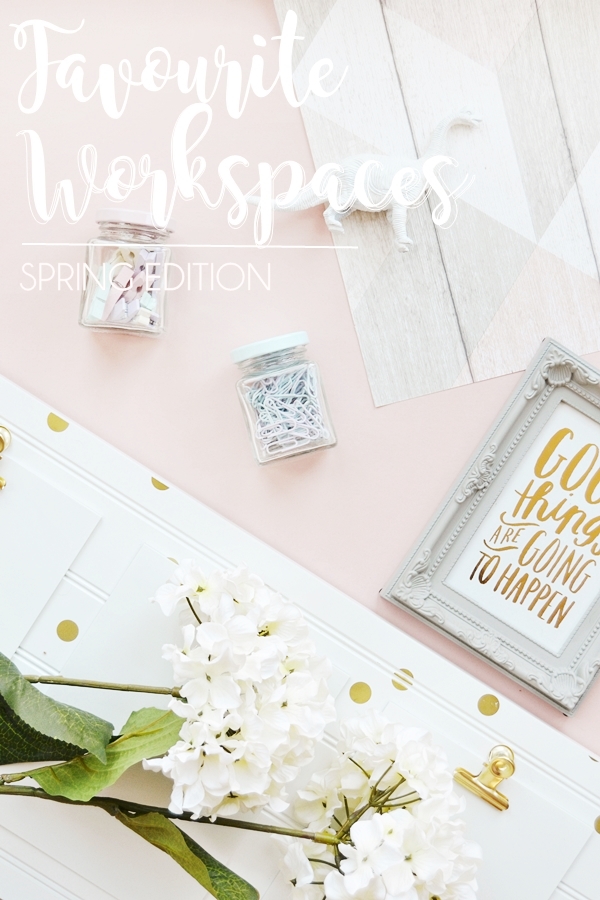
Spring has sprung here in the UK, well for the North West anyway, and I for one have been in the mood for a spring clean!
Spring clean, done, and I'm now focusing my attention on my less than bland office. You see when I moved house at the end of 2014 I dumped any office related things into my spare room and since then have kind of avoid it. But the wind had changed for me and I'm totally in the mood for injecting a bit of life into my work area and hopefully using it!
So in the past week I've taken to various blogs and of course Pinterest for inspiration and picked four of my favourites to share with you. I've also realised that I've somehow become a pastel person and know that will be the spring theme of my new workspace!
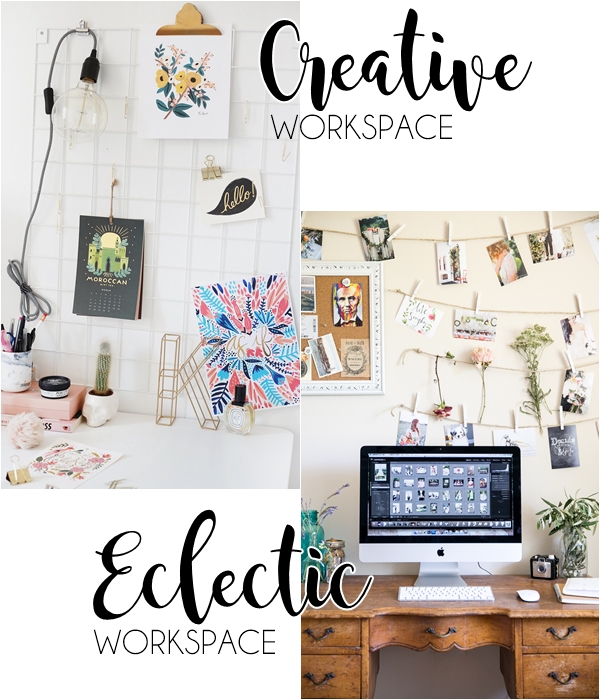
The Creative Workspace from Kate La Vie
When it comes to interiors Kate knows how to get it just right - always effortless, fun and creative. What I love most about her workspace is that it's fairly clutter-free yet interesting, just enough to get you inspired, you know? The white wire memo board is a perfect touch with her simplistic colour scheme as any other colour of metal would have been too dominating, but the white let the clipped prints and lamp become the focus. This is a desk I'm just so inspired by as it's perfect for the brighter coming months.
The Eclectic Workspace from xo, Krista
Desks with personality always grab my attention and whilst endlessly browsing Pinterest this without a doubt stood out to me. I decided to sum up this workspace as 'eclectic' as it's a mish-mash of styles, yet it's somehow remains feminine and intricate. What I most like about this space other than the antique desk that works so well, are the pegged photos and flowers that are clearly mementos of happy days which is a lovely touch. I don't feel I've established my own style enough to have a workspace like this just yet, but in the future a comfortable, inspiring work area like this would be a dream.
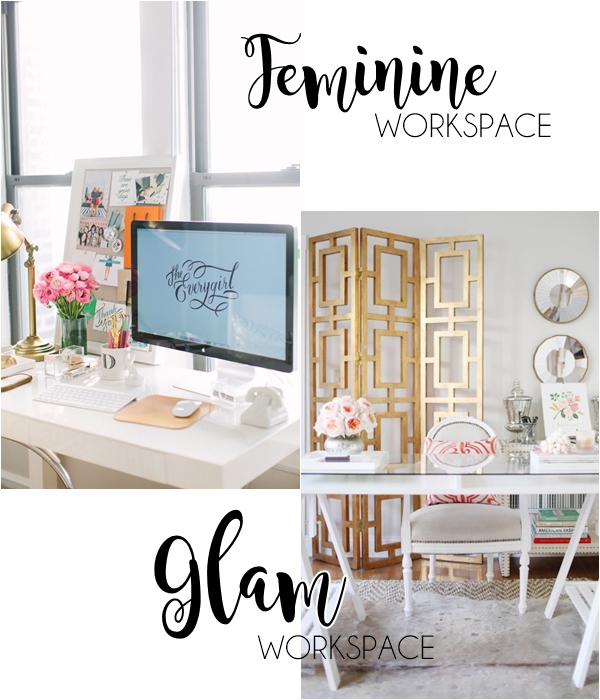
The Feminine Workspace from The Everygirl
My past desks have always been feminine yet simple which is most likely why I was drawn to this lovely desk. I love the interesting little trinkets, gold touches and of course the posy of flowers (for me a desk isn't complete without a bunch of flower, faux mind). But what I love most of all is the position of the desk, against the window. Not only does this mean you're facing the light rather than a wall but it means no glare against your screen - genius! This may or may not work with the desk I have (it's actually the same desk as the last image but with different trestles) but I will be moving it to see how it looks this week. My ideal workspace!
The Glam Workspace from Dallas Shaw
Last but not least the desk that says GIRL BOSS. Well girl boss with a feminine edge! I was instantly draw to this office for the layout again, I sadly don't have enough space for this but I love how the desk dominates the room and it's so important it deserves a rug! I also like how the gold screen also adds interest to the decor, a good idea for renters or someone that likes to change things up frequently. I don't think I'll ever have a glam workspace like this as it's not very 'me' but I still love it!
I will 100% give you an update on my own office/work space with pics when I've completed my re-vamp!
Fee xo.
If you're a beauty/lifestyle blogger then like me you will probably be on a constant hunt for tips and tools to make blogging easier.
Over the years I've tried out so many things, some I still use today and some that got instantly dismissed. So I thought I'd share with you my top 5 creative resources that are for the most part free!
Creative Market
Much like Etsy, Creative Market is a marketplace for digital downloads created by creatives. You can find blog templates, illustrations, fonts and stock images here, plus a whole lot more. Prices vary from a few dollars to more expensive bundles, however every Monday if you are signed up to Creative Market here (which I highly recommend!) you receive 6 free products to download! Of course not all the products will be to your taste but I've found I always like one or two products from the free goods. In fact the Chevron pattern and 'resources' font came from this week's free goods! Credit can also be bought for as little as $20 and spent across the site - I did this in December and decorated my Christmas blog posts with festive illustrations which you can see here and here. I've also found some amazing fonts that I constantly use to decorated blog images with. A total gem of a website for bloggers!
DaFont
Now I was on the fence whether to mention DaFont as it's such a popular website that I'm sure every blogger knows about. But for me it really has been a valuable website that I use monthly to find new fonts, so I couldn't not include it. My favourite fonts have to be modern calligraphy styles and DaFont has a whole range of them all for free personal use! Below I've used the Magnola Sky font for the 'blogging' text and absolutely love it! I also frequently used Cavier Dreams, Champagne & Limousines and Chasing Embers, all of which can be found in the 'top fonts' section.
Created in Photoscape using - Magnolia Sky typeface fron DaFont here, Kathleen typeface from Creative Market here and Watercolour Chevron pack from Creative Market here (all free items)
Photoscape
I've mentioned Photoscape so many times now that I worry I'm starting to sound like a broken record, but it's my photo editing software of choice after Photoshop and it's totally free! This does it all - photo corrections, adds text, resizing, batch editing and lots lots more. Both the main image and above images where created using Photoscape and I basically can't live (well blog) without it!
Canva
Another editing type graphic design program is Canva which you use in your browser and is so flexible in what it can do! Here you can make social posts for Instagram and Twitter, Facebook cover images, create blog infographics, posters and even business cards. You can also upload your own images to create collages with and add overlay text. I also find it gives me ideas on how to layout images and how to pick the right fonts.
Another editing type graphic design program is Canva which you use in your browser and is so flexible in what it can do! Here you can make social posts for Instagram and Twitter, Facebook cover images, create blog infographics, posters and even business cards. You can also upload your own images to create collages with and add overlay text. I also find it gives me ideas on how to layout images and how to pick the right fonts.
Pixabay
Last but not least I wanted to mention a new find for me - Pixabay. I think we can all agree that finding free stock images online is a pain and to find the right image can take hours but finally I've found an amazing website with over 590,000 free images and illustrations! What has most impressed me with Pixabay other than the volume of images is that they all can be downloaded at a large size making them amazing to use in blog posts. I'm so pleased to have discovered this website!
Hopefully you've found a few new resources to try out here!
Fee xo.
If you're a fellow blogger then you're probably struggling with the lack of light right now and I totally feel your pain! Taking hundreds of images only to discover they are too blurry and dark to use is the worst. But never fear there are more than a few ways to improve your photography and produce bright images even on the dullest of days.
Here are my top 5 tips to do just that!
Shoot your images when the sun is at it's brightest - 12pm-1pm in the UK
Technically the sun is always at it's brightest and it's the weather that determines how visible the sun is in the sky. But on a typical overcast Winter's day the sky should be at it's brightest around 12pm-1pm so that would be your time to get taking photos, of course near a window for the maximum amount of natural light. My key tips here would be to turn off all the lights in the room and turn off the flash on your camera as neither will do your images any favours.
Use equipment
Using photography equipment can help you shot your images in so many different ways, especially in bad lighting conditions and it doesn't have to cost a bomb. I'd personally recommend first buying a basic tripod to keep your camera still when taking your photos and if you still find your camera shakes when you press the button to take your images then a Remote Shutter Release will sort out the problem, you can expect to find both items for under £10. As for lighting you can invest here if you wish but I'd suggest keeping it portable and inexpensive to begin with to see how you get on. A great portable option for your camera is a LED Ring Flash Light (£22.49 - eBay here) that will fit around your camera lens and illuminate your images. Or you can opt for two lamps either side of your setup with high watt daylight bulbs as another portable option that doesn't require too much setup time.
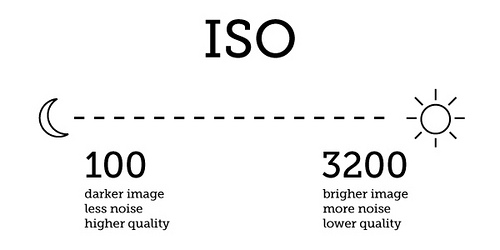
Set the ISO number according to your lighting conditions
Most cameras have have an ISO setting, even digital cameras, and it's more than easy to keep it set to 'auto'. However on dull days setting the ISO to a higher number can do wonders for how bright your images will turn out. Anywhere from 400-800 won't compromise photo quality/add grain and can really brighten overall images. However a steady hand or tripod may be needed!
Bounce the light onto your setup
When shooting in dull lighting conditions you can find parts of your setup to be darker than others or in shadow which even in post-editing can be a pain to correct. So the best time to tackle these issue is when shooting and the best way to bounce natural light back onto your setup is to use a reflector. This is basically a reflective surface that will bounce natural light straight onto your setup just where you require it. You can find my own DIY reflector, made from tin foil and a ring binder here, or you can opt for something more professional with a large collapsible reflector (£6.95 - eBay here) that will do the job even better and can be used in self portraits for makeup looks as well.
Use photo-editing software to get the most out of your images
Lastly I cannot stress how important photo editing can be for the overall look of your photos... though I'm sure you already know this as a blogger! So getting to grips with your photo editing software or upping your game and investing in Photoshop is a must. With all my images in Winter I up the colour temperature, brightness, contrast and if the image isn't as crisp as I'd like I use the sharpening tool. If you are looking for a better photo editing program than what you are using I highly recommend PhotoScape which you can find on CNet here... for free! But if you want to get to grips with Photoshop then From Roses has an amazing introduction to it here.
Hopefully my tips have been helpful and fingers crossed Spring comes early this year!
Fee xo.
Subscribe to:
Posts (Atom)