.png)

Last Thursday saw the first ever Nationa Nail Polish Day... and guess what, I missed it! Yes, it was just a totally made up day from Essie but as a HUGE nail polish lovers I did initially "ooo" at the news.
However, it did make me realise that in the past year Makeup Savvy has been sorely lacking on the nail polish front. I of course still paint my nails, bi-weekly in fact, but I just don't ever think to mention the shades I'm wearing/loving! I'm not sure what's changed but hey ho, here I am sharing some nail polish goodness today. Maybe this post will get me back into nail blogging, who knows!
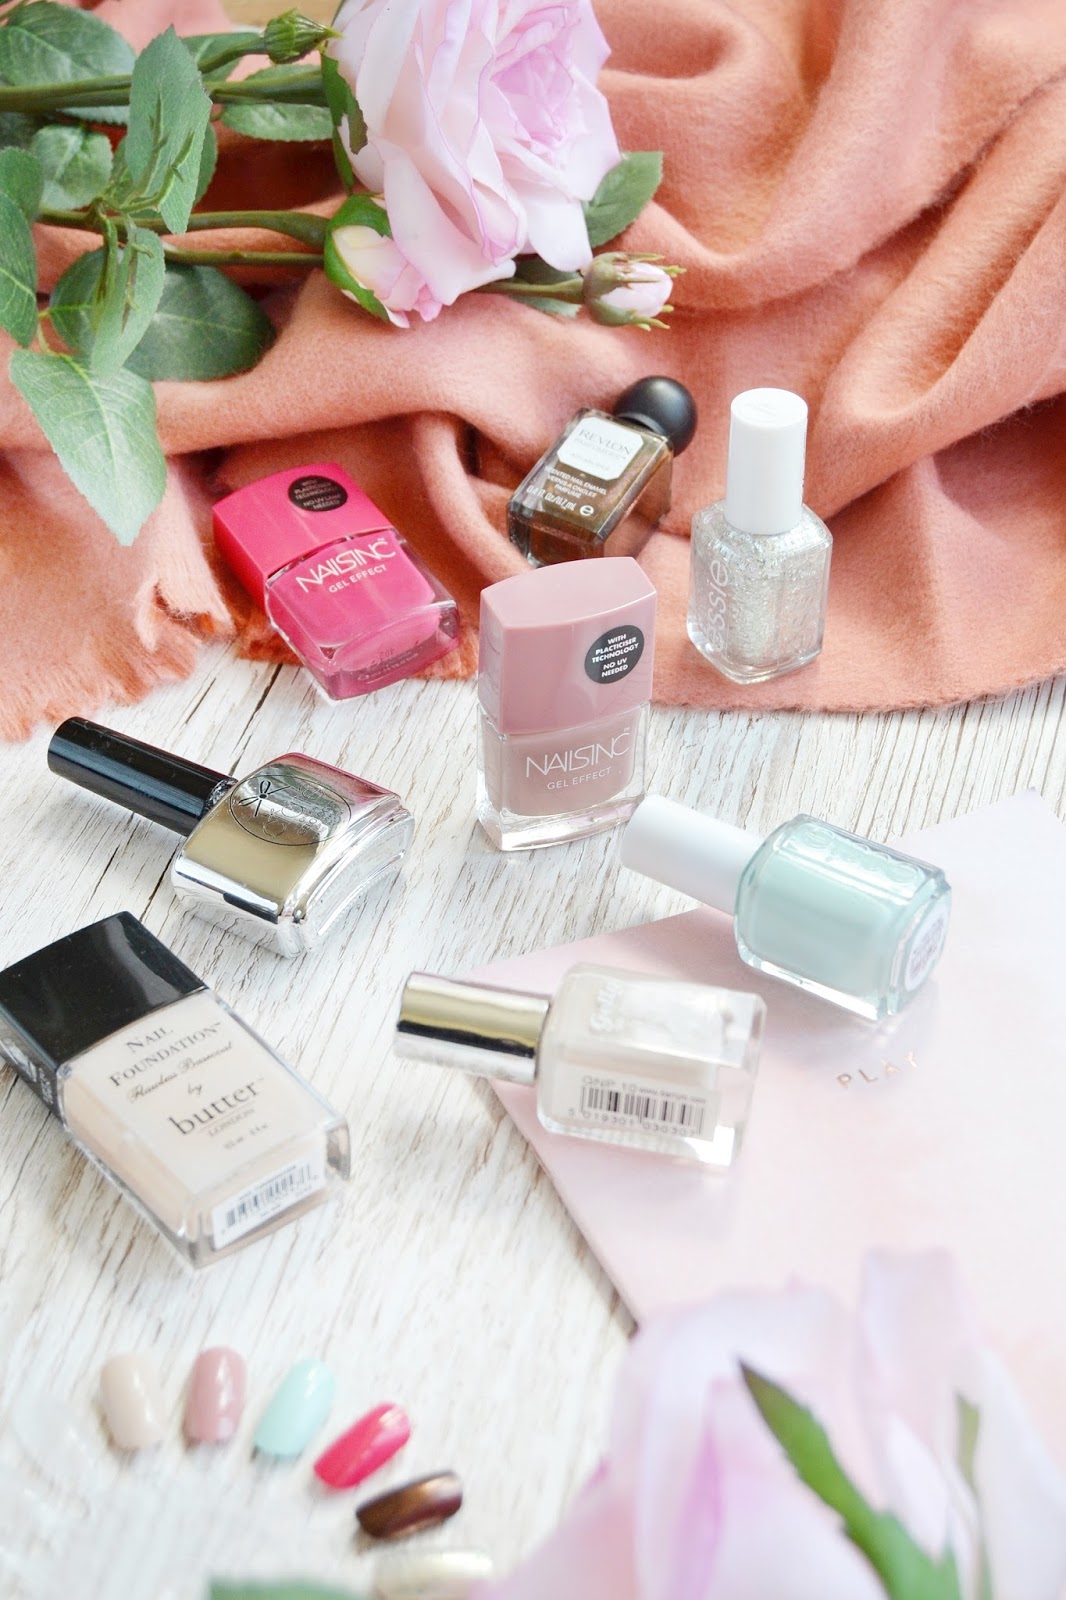
With a nail polish collection ashamedly well into the hundreds I sat down and took the time to look through it, picking out the shades I use most often. Below I've neatly categorised them by shade, which was a tricky thing to do because this girl loves a nude nail polish, not to mention a pretty full on glitter.
A few weeks ago I got on the gel manicure train. Well I dipped my toes in first with a nail polish to gel kit from SensatioNail (review post) which allows you to transform any normal nail polish into a gel one - pretty cool, right? But since then I've wanted to try out a full gel nail kit with actual gel polishes - 1. To see if the process was easier 2. To indulge my new love of gel nails!
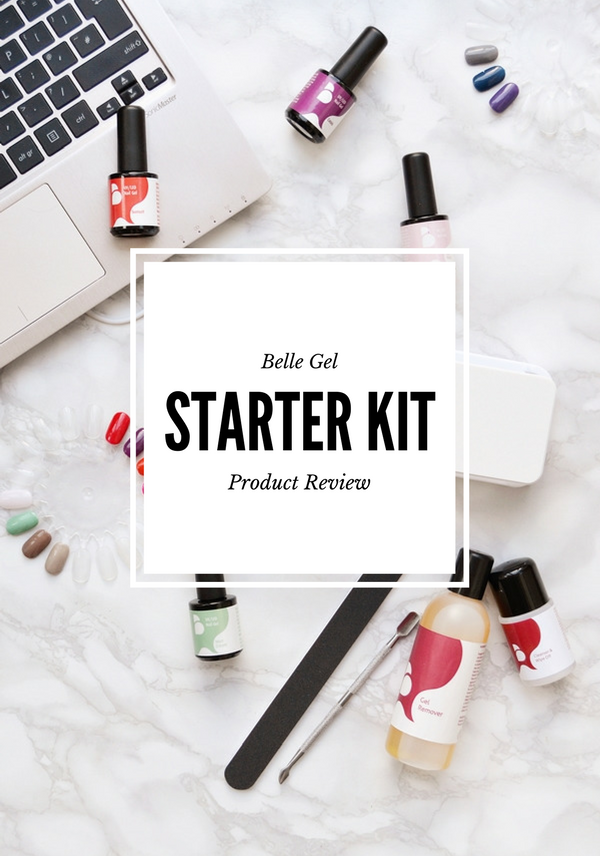
As you can see here I now have a full gel nail starter kit and lots of wonderful gel polishes from Belle Gel that I've been testing out and today I thought I'd give it a full review and my honest options on gel manicures in general... because it's not all positive (see below)!
What you receive in the Belle Gel starter kit
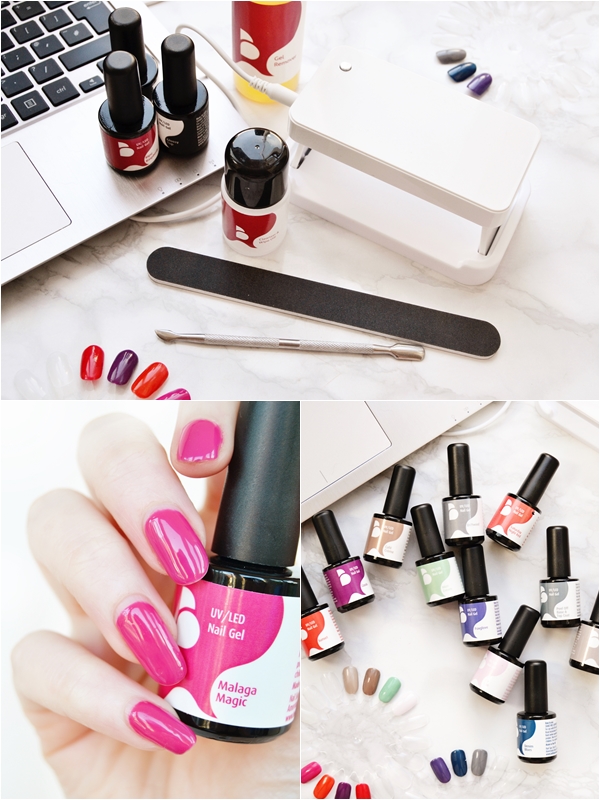
Portable LED lamp, USB lead & mains plug, fabric travel wrap, protector base coat, glossy top coat, 'Ripe Raspberry' gel polish, cleanser & wipe off 30ml, nail file
Price - Belle Gel Starter Kit £54.95 here or Peel Off Gel & Lamp (gel colour not included) £34.95 here. You can also buy additional items from the Bella Gel website such as - nourishing cuticle oil, cuticle pusher, cleanser & wipe off 100ml, gel remover 100ml, foil wraps and 12 gel colours.
My First Gel Manicure
For my first gel manicure I decided I wanted ultra pink nails with Malaga Magic and as you can see it turned out pretty shiny and lovely. Below I've detailed the process, which I found pretty easy and took around 5 minutes per hand. As for how long my nails lasted, it was a good 9 days before a few edges chipped and I had to remove it (which is a longer process of around 20 minutes!). You can also find swatches of the full gel colours to the bottom of this post.
Gel Application
- Prepare: Light buff nails to remove shine. Cleanse to eliminate dust and natural oils.
- Protector Base: Apply a thin, even coat and cure for 60 seconds.
- Colour Coats x 2: Apply a thin, even application of 2 coats of colour, curing each for 60 seconds
- Glossy Top: Finally apply a single glossy top coat and cure for 60 seconds
- Finish: Wipe over nails with the cleanser on a paper towel and voila, your nails are dry and finished!
Thoughts on the starter kit
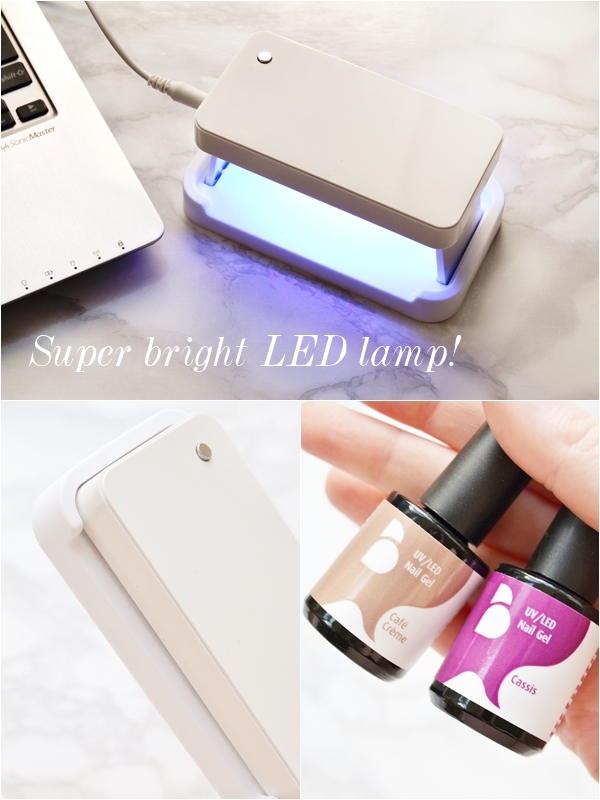
My instant thoughts of this gel kit as soon as I set it up (all of 5 seconds) was focused towards the LED lamp with how portable it is, it's slightly bigger than a deck of cards, and how bright the LED lights were... which I'm sure helps with a quick and more solid gel manicure. I also loved the addition of fabric travel wrap as the LED lamp fits into one of the pockets as do all the accessories - so you can ditch the box and when it comes to doing your nails you can roll the wrap out on the table and have everything instantly to hand.
As for the gel colours, I do think most gel polishes are of the same standard however the colour range with Belle Gel is good, I'm in love with the two shades above, and I like that the starter kit does come with a gel colour in Ripe Raspberry. You can see swatches of the full gel colour collection below which are all priced at £12.50 for 8ml. But of course you are free to use an brand of gel polishes with the LED lamp - I personally love Elite 99 shades which start from only £2.50 on eBay here.
The not so positives to gel nails
If you are a nail polish picker then gel nails are seriously not for you! Even though gel nails last 8+ days you can always find an edge to peel/lift up and peel off. This will seriously damage your nail bed, especially over time as you will end up peeling parts of the surface layer of nail off and end up with weak brittle nails!
Gel nails aren't something that can be relaxingly done in dull lighting at night. The LED lamp, especially this one, is bright and from personal experience and asking others it can cause headaches. LED/UV light isn't supposed to be looked at directly however there is a certain amount of glow that comes off the lamp when it's in use that you really can't avoid looking at when doing the gel process.
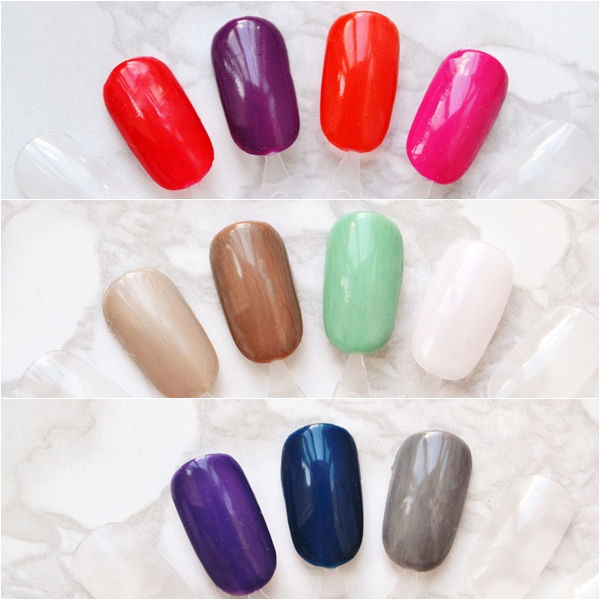
Belle Gel - Full gel polish swatches (left to right)
£12.50 each here - All shades apply streak-free and cure to a ultra smooth, glossy finish
Row 1 - Saturday Night Red, Cassis, Sunset, Malaga Magic
Row 2 - Oyster, Cafe Creme, Mint Cream, Ice Pink
Row 3 - Foxglove, Denim Blues, Driftwood
Overall this kit is ideal if you are new to gel nails! It's easy to use and I still can't get over how compact the LED lamp is. I also love that there is a peel off option which is perfect if you don't have the time to soak off your gel nails.
A really good Gel nail kit here that I would recommend.
Fee xo.
If you've read Makeup Savvy for a long time you may have noticed a lack of nail posts this year. That would be because I'm become fairly lazy with my nails. Gone are the days I change my nail polish bi-weekly and I've even stopped buying them!
These days I like my manicure to last as long as possible - basically I'm a normal nail polish wearer and not an obsessed nail blogger anymore. FYI - I still love nail polish, don't worry!
These days I like my manicure to last as long as possible - basically I'm a normal nail polish wearer and not an obsessed nail blogger anymore. FYI - I still love nail polish, don't worry!
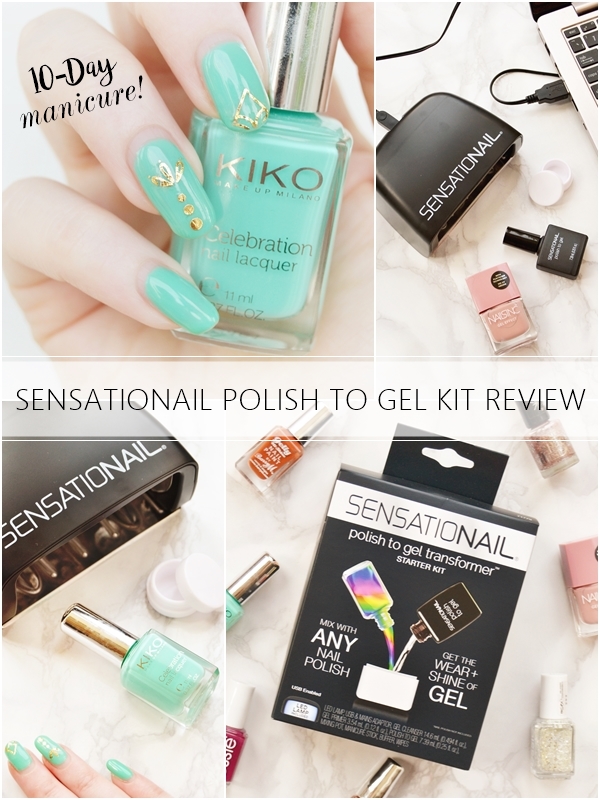
So when Sensational asked if I wanted to try their affordable Polish to Gel Starter Kit (currently £34.99 saving £15.00 at Boots here) I literally jumped at the chance because even though I've never experienced gel nails I've often admired my sisters ultra glossy talons after coming back from the nail salon plus I really wouldn't mind keeping my nail polish on my nails for long than 4-5 days. I also don't think I could fully get on board with gel nails and leave my extensive nail polish collection to collect dust and dry up!
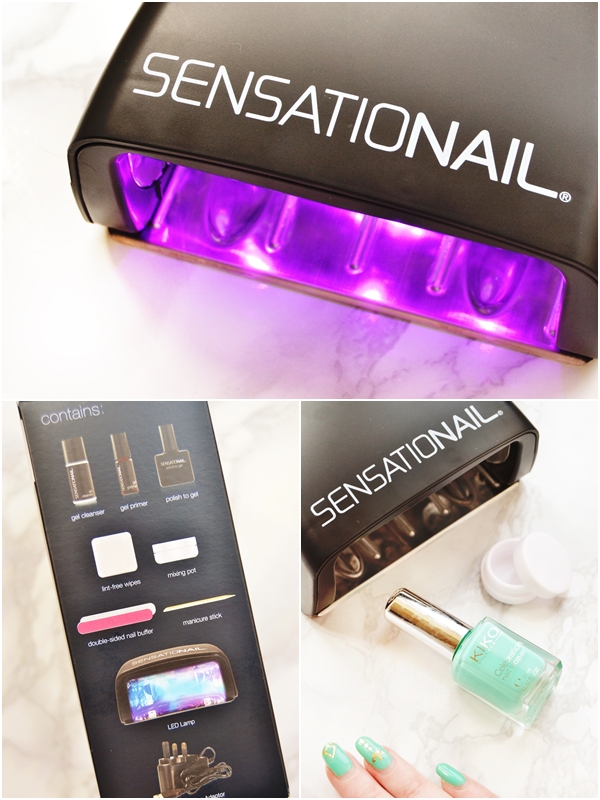 |
| The LED lamp can either be plugged into a wall socket or with the USB lead to your laptop! |
Which is why the Polish to Gel Kit makes sense if you already own a lot of nail polishes you still want to use. In the kit you receive pretty much everything you need to achieve gel nails at home but with the addition of the polish to gel transformer which you can use it two ways.
The simple gel top coat method
Paint your nails as normal (with a normal nail polish) and then once fully dry, we are talking 2+ hours here, apply the transformer top coat and cure under the provide UV/LED lamp for 15 seconds. Amazingly glossy and smooth nails that will last you 7+ days.
Paint your nails as normal (with a normal nail polish) and then once fully dry, we are talking 2+ hours here, apply the transformer top coat and cure under the provide UV/LED lamp for 15 seconds. Amazingly glossy and smooth nails that will last you 7+ days.
The longer mixing method
Mix your own nail polish with the transformer polish in the mixing pot provided and apply two coats, curing between each coat and then apply a single coat of the transformer as a top coat and cure again. This is more faffy however if you are someone that can't wait for your nails to dry and often smudges them you will be pleased to know once you're done they will be rock solid and won't smudge. This longer process also means you get an even longer wear time! My nails (below) using this method have been perfect and have lasted 10 days so far - amazing right?
Mix your own nail polish with the transformer polish in the mixing pot provided and apply two coats, curing between each coat and then apply a single coat of the transformer as a top coat and cure again. This is more faffy however if you are someone that can't wait for your nails to dry and often smudges them you will be pleased to know once you're done they will be rock solid and won't smudge. This longer process also means you get an even longer wear time! My nails (below) using this method have been perfect and have lasted 10 days so far - amazing right?

What method is best?
Personally I know I will use both methods for various reasons. Most of the time I can see myself using the simpler method of applying the transformer top coat and curing them once under the lamp as I'm generally ready for a change after a week. However I'll be certainly using the longer mixing method to create full on gel nails when I go on holiday and I'll be using this method on my toes so I can keep them in perfect condition for 2 weeks plus... yes, I'm lazy but I'm sure we're all a bit lazy when it comes to pedicures!
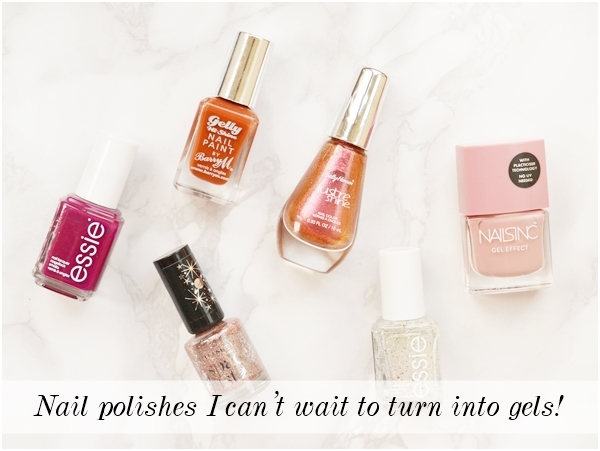
I'm also thinking both methods are great for that nail polish that always chips, everyone has one in their collection I'm sure! For this reason I'm excited to transform some of my amazing duochromes that chip so quickly, plus I'm already ooo'ing at the thought of the smooth glossy finish under bright lighting - I'm still nail obsessed deep down!
I'm also thinking both methods are great for that nail polish that always chips, everyone has one in their collection I'm sure! For this reason I'm excited to transform some of my amazing duochromes that chip so quickly, plus I'm already ooo'ing at the thought of the smooth glossy finish under bright lighting - I'm still nail obsessed deep down!
Removal
As for removal, just like gel nails or even stubborn glitter nails, they need to be soaked in acetone with tinfoil wrapped around them for 20 minutes and then the excess removed with a wooden stick. This does take a bit of time but having done it twice now I'm getting use to sitting with alien fingers whilst watching TV!
I should point out that if you aren't new to gel nails and already have a lamp and supplies then I'd highly recommend picking up just the Sensationail Transformer Polish to Gel Refill (small size £8.99 here or larger size £12.00 here) and using this method to get back to using some of your old non-gel nail polishes but as gels!
Side note - I also love that water nail decals can be used or just cut up temporary tattoos (what I used on my nails in this post) or even painted on nail art and then sealed in with the Gel top coat. I just can't get over the smooth feel and how they stay perfect for so long!
Overall I really think this is an extremely affordable kit that can also be used as a standard gel kit and I wouldn't hesitate to recommend this to anyone that wants a longer lasting manicure or to save money by ditching the nail salon.
Let me know your thoughts on the kit and if you've ever thought about transforming your standard nail polishes into true gel nails.
Fee xo.
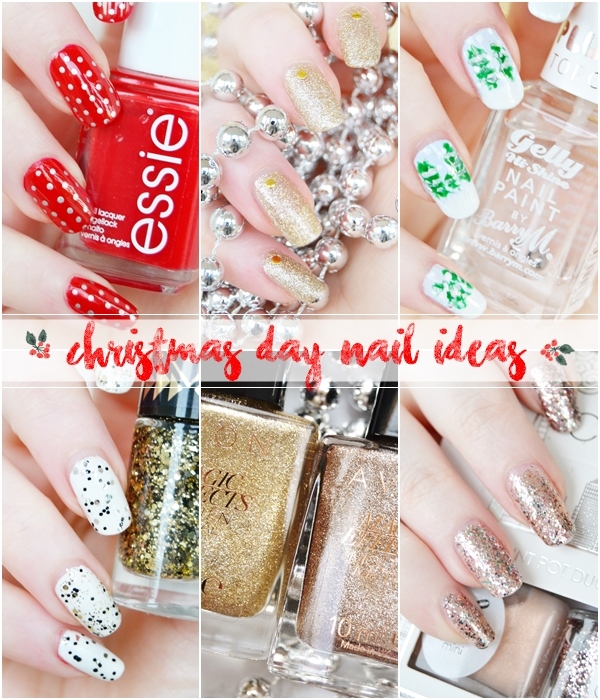
Ahhh Christmas nails, I love you so!
For my last post before Christmas Day I thought I would sign off with a few Christmas Day Nail Ideas because even if you don't often paint your nails the big day is a great time to sport some super festive or glittery nails.
I've tried to keep my glittery suggestions to a minimum are glitter nail polish is the worst to remove and no one wants to be sat wasting 30 minutes of their life post Christmas when they could be eating chocolate or creating a mini cheese platter (I'm sure that's not just me). So here is a mix of ideas that you can re-create/inspire you!
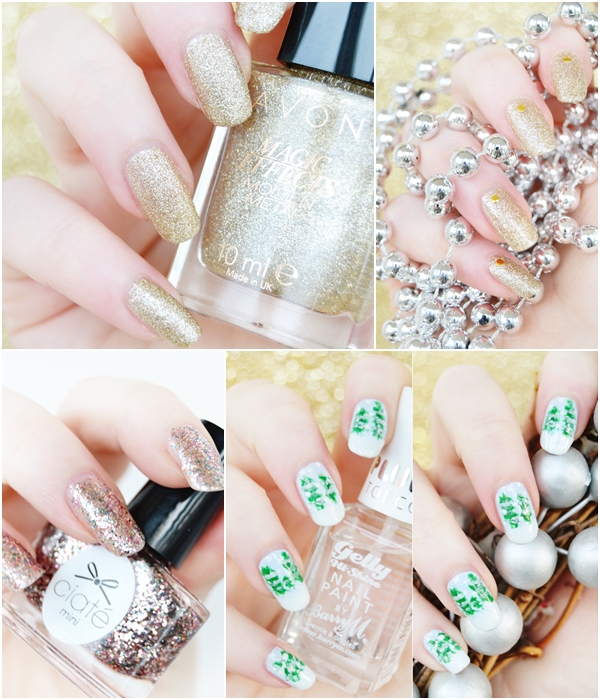
1. Subtle gold glitter nails - This nail polish is for the glitter lovers out there that hate the removal process of glitter nail polish as this is a fine glitter that is opaque on the nails but easy to remove! I absolutely love how the Avon Magic Effects Molten Metal nail polishes (£6 each - Avon brochure) look and the above gold one is my favourite. Rimmel do similar Precious Stone nail polishes if you want to get something like this before Christmas Day!
2. Glittertastic! - However if you don't mind the annoyance of removing glitter nail polish then a full of glitter like this Ciate Tinsel Town mini is the way to go. This mini is part of the Ciate Paint Pot Duo To Go set which you can find on Very for £12.99 here or ASOS have many single glitter mini polishes for £5.00 here.
3. Snowy scene nail art - On to some festive nail art now which was actually pretty easy to create! Here I simply started with a light blue base and using an old makeup sponge stippled white nail polish on the tips. Then to create the little trees I used a nail art brush and created messy Christmas tree shapes and then finally I used a dotting tool to add a little bit of snow. I love nail art like this that doesn't need to be neat as you can have it done in under 10 minutes while watching TV. Another favourite of mine is Christmas pudding nails as they are so so easy to do - lots of quick tutorials can be found on Google.
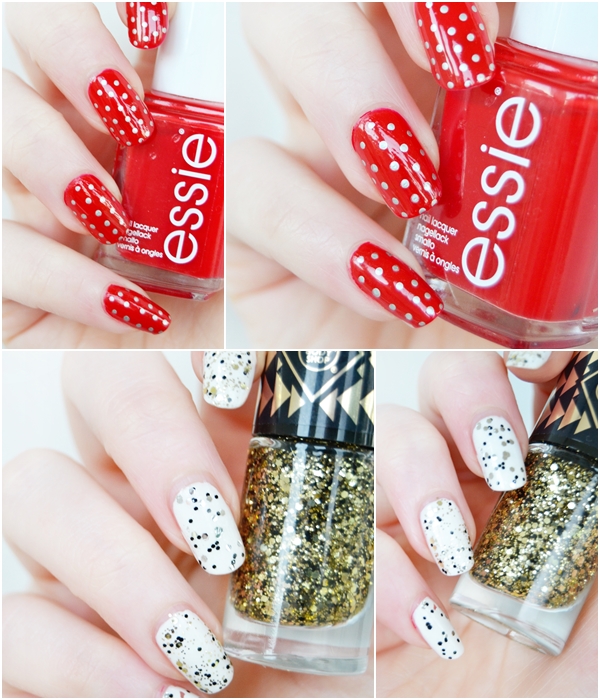
4. Easy red & silver polka dots - If you fancy doing a bit of nail art but just haven't the time or patience then this nail art is for you. Here I've used Essie Russian Roulette as I love a vibrant red but you can use any base colour - white, black, green etc. Then you simply dot on the silver dots with a silver Sharpie pen! It really is that easy! My only tips would be to start with a vertical line of dots down the centre of your nails then work outwards for a neat look and to finish with a top coat as the Sharpie will wash off if you don't. Super easy and festive!
5. Salt & pepper glitter nails - Lastly for my Christmas Day nail ideas I thought I'd include another glitter favourite of mine, well two in fact. These two nail sequin nail polishes are limited edition at The Body Shop (£5.00 each) and can be worn as a single coat over the nails like I've done here or built up for an even glittery finish. I went for a white base but next time I think I will be trying the nail sequin nail polish over a gold or black base. Just really pretty and perfect for this time of year.
Hope this has given you a few nail ideas for your Christmas Day nails!
As this is my last post before December 25th, I hope you all have a very lovely Christmas!
Fee xo.
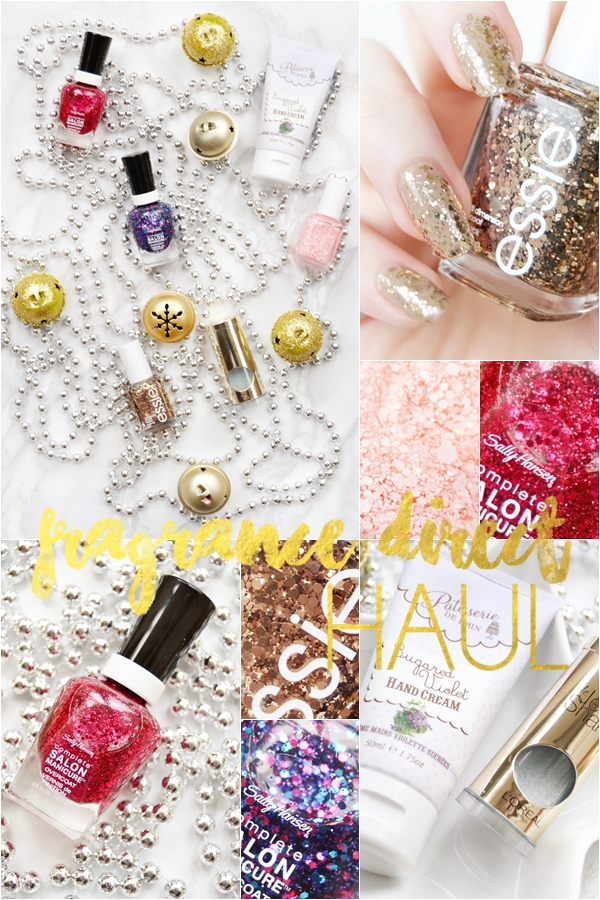
Last week I decided it has been too long since I'd ordered from Fragrance Direct, so I hit up the website and placed a savvy order of all things nails just in time for the festive party season.
I really wanted to share with you what I picked up, especially all the glitter nail polish as they are all totally gorgeous and were such a bargain! I also picked up an interesting nail product that I'd never seen before so that also swayed me to write up this haul post.
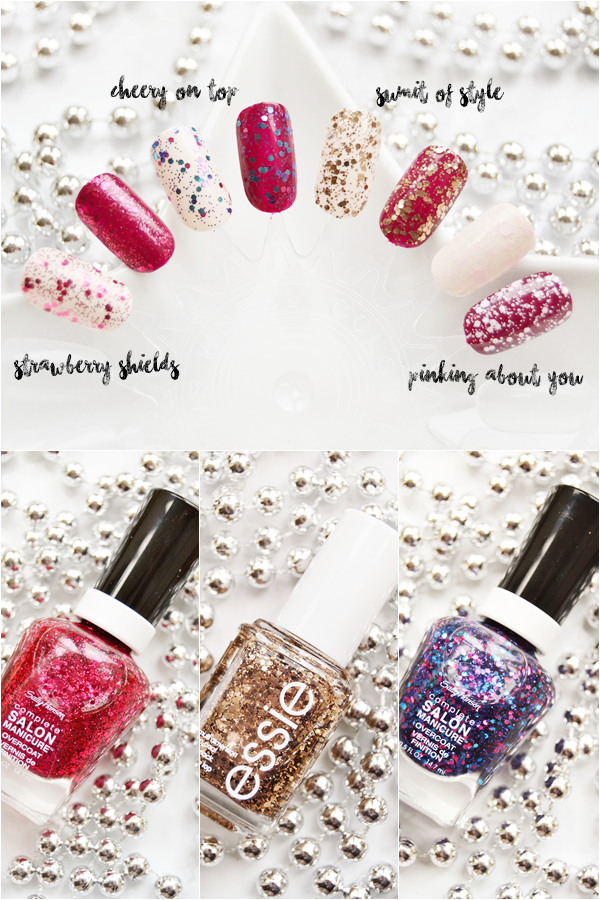
Essie nail polish in Sumit of Style and Pinking About You
£2.49 each - Fragrance Direct here
Whenever I shop on Fragrance Direct I always pick up a couple of Essie nail polishes as they are amazing value at only £2.49 (compared to £8 everywhere else - Superdrug, Boots etc) and they have such a colour choice to pick from. As I was feeling particular festive I had to pick up some glitter shades as these are always my favourite from Essie! Essie Sumit of Style is just a gorgeous old gold coloured glitter that I know will look particularly amazing over nude and black nail polishes and just on the very tips of the nails.
As for Pinking About You this is the most subtle light pink glitter that actually looks like snow on the nails! This will certainly be going over red manis this Christmas but also one I know I will use all year round. So pleased with both these buys.
Sally Hansen Complete Salon in Strawberry Shields and Cheery On Top
£1.99 - Fragrance Direct here
Whilst looking at nail polishes I spotted some fab new Sally Hansen glitter shades and was lured in by the prices of them! I was instantly drawn to the wonderful cranberry coloured glitter that is Strawberry Shields, in fact it reminds me of a slightly lighter version of Deborah Lippman Ruby Red Slippers when paired with a deep crimson red base. I've already been wearing this over Essie Bahama Mama (again bought from Fragrance Direct!) and totally loving it and it's Christmas-y vibes. This definitely is a glitter that suit a deep coloured base for a vampy nail look. Obsessed!
I also picked up Cheery On Top on a bit of a whim because I felt I couldn't just buy one Sally Hansen nail polish. This interesting shade contains a mix of pink, purple and turquoise glitters in various sized pieces and as I wasn't sure what shade I'd wear it over I took to Google and looked at a few nail swatches. From looking at different nail blogger swatches and reviews I will now be pairing this with grey nail bases and deep purple shades (probably Essie Bahama Mama, actually) and applying a matte top coat over it as it looks stunning when mattified!
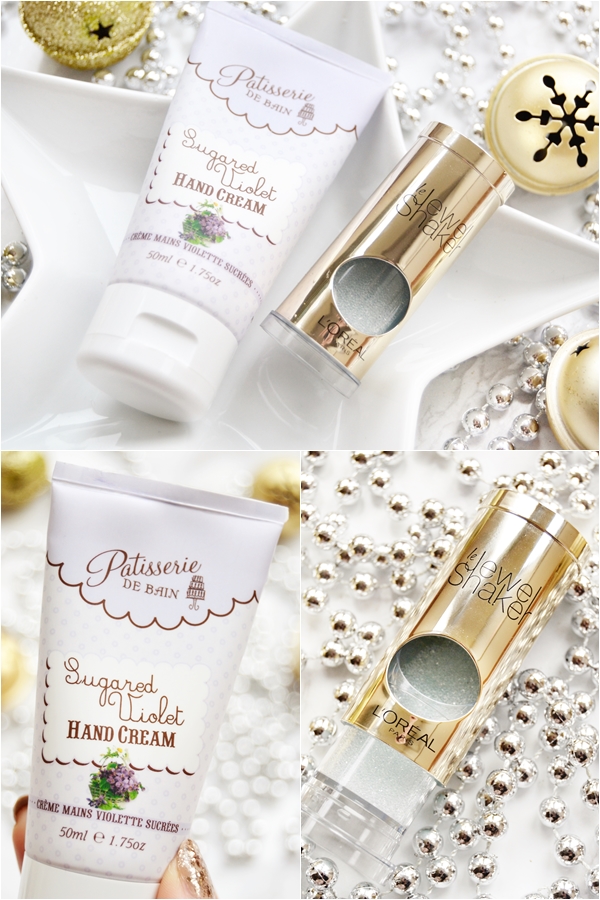
L'Oreal Le Jewel Shaker
£2.99 - Fragrance Direct here
This was the item I mentioned about never seeing before in shops or online, I'd love to know if any of you knew that L'Oreal came out with this product actually! This is basically an easier take on caviar nail trend with the little golden tube containing micro clear beads. You simply paint your nails, open up the tube carefully, insert a finger, and shake! Sadly I couldn't find any clear swatch images of the Jewel Shaker but I thought I'd see how I went with it... if the results are nice I will have to show you!
Rose & Co Patisserie De Bain Sugared Violet Hand Cream
£2.99 - Fragrance Direct here
Lastly I picked up a none needed hand cream in my favourite ever scent - parma violets. I've previously bought the glass pot version of this and it was total love but I can't say I loved having to dip my fingers into it to use the hand cream, so this time I went with the more hygienic version with a tube of it. This really won't be many people's cup of tea and only suited to people that love the smell of violets as this is incredibly scented and does linger for quite some time, but I totally love it! It also leaves your hands silky soft within a minute of applying it. Just lovely.
Hope you enjoyed this haul!
Have you ever picked up any bargain nail polishes from Fragrance Direct before?
Fee xo.

After a summer of bright hues it's time to tone it down with warm deep shades and I for one am excited by this!
Autumn for me it a time for layering and comfort but also looking chic. This of course extends to the nails and though each year we get told what this year's 'trends' are, you really can't go wrong with deep berry shades, anything with a hint of copper and a neutral grey.
Autumn for me it a time for layering and comfort but also looking chic. This of course extends to the nails and though each year we get told what this year's 'trends' are, you really can't go wrong with deep berry shades, anything with a hint of copper and a neutral grey.
Here I have just that for you in the form of five inexpensive nail polishes that will take you right through until Winter. Hope you try a few of these out!
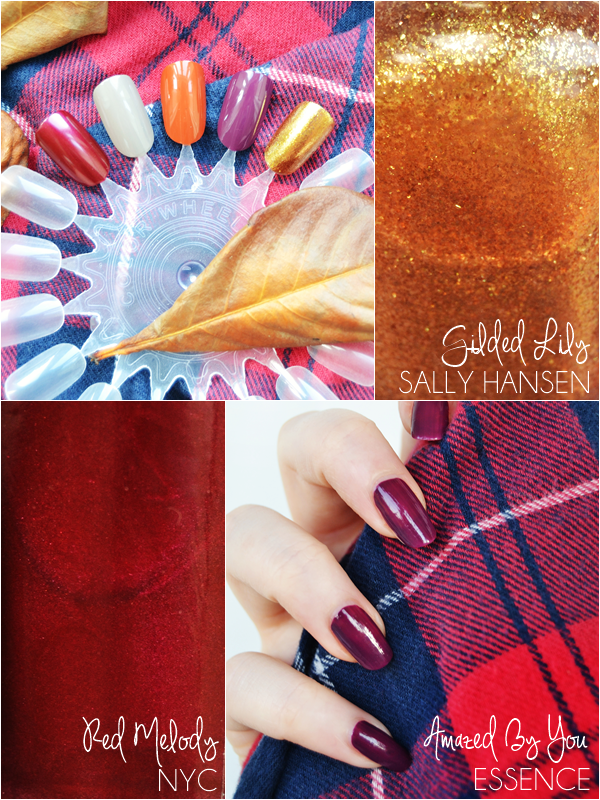
Sally Hansen Gilded Lily
£1.99 - Fragrance Direct here
This stunning glimmering shade from Sally Hansen is an all time favourite of mine for Autumn. With a subtle duo chrome this dazzles in the light both gold and copper hues. Though this does require a base colour or a few applications to get a good enough coverage this is well worth it, as it's truly autumnal.
NYC Red Melody
£1.79 - Superdrug here
For me NYC is the stand to visit for on-trend shades as at £1.79 they are such a bargain but also really great quality. Here I have the stunning Red Melody, a deep berry shade with a subtle shimmer. This is not only perfect for Autumn but also Winter and Christmas with a little glitter top coat to finish it off. What I also love about this nail polish is that it dries fast and doesn't require a top coat as it dries with a glossy finish.
Essence Gel Polish Amazed By You
£1.60 - Wiko
This is new shade for Essence and one I'm totally digging for the colder months; I can see myself wearing it often. Deep berry tones such as this one never go out of fashion and look great with any outfit. This is an impressive one-coater however both a base coat (it stains!) and top coat is needed. If you are near a Wilko store anytime soon their Autumn range is definitely worth checking out!
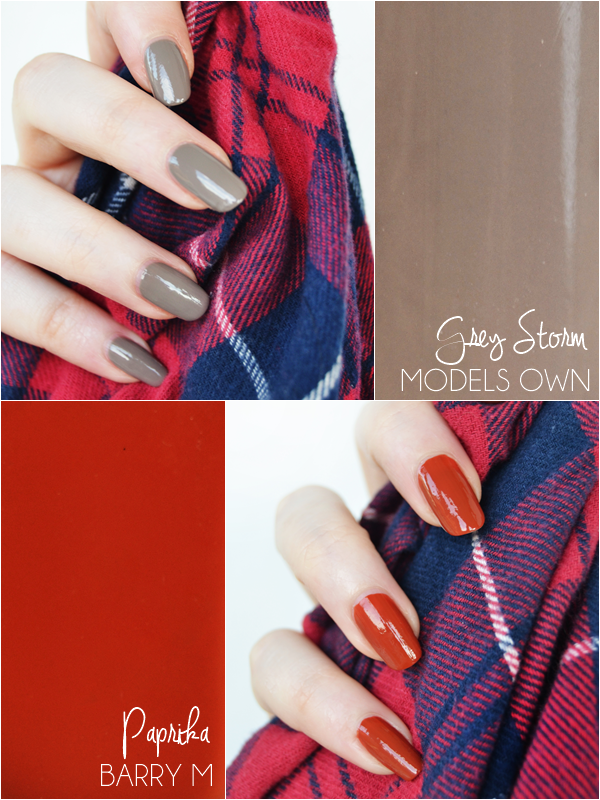
Models Own Grey Storm
£5.00 - Models Own website here or Boots
Another new shade here for Autumn with the Twilight collection. This is a lovely semi-deep grey that looks effortlessly chic on the nails and will go with pretty much everything. Although grey isn't everyones cup of tea I feel Autumn weather sometimes calls for it and it can look great against an autumnal outfit. I also highly rate the HyperGel formula - so glossy and long lasting.
Barry M Gelly Hi-Shine Paprika
£3.99 - Boots here or Superdrug
Lastly another favourite that is just spot on for Autumn. You seriously can't go wrong with this shade! Along with a great shade that's only suits colder months the formula applies with ease and doesn't require a top coat as it dries to such a lovely gloss finish. Also worth looking at the entire Gelly Hi-Shine range as there are a few other great autumnal shades.
Hope this has given you a few idea for autumnal nails!
Let me know what shades you love to wear in Autumn.
Fee xo.
Subscribe to:
Posts (Atom)